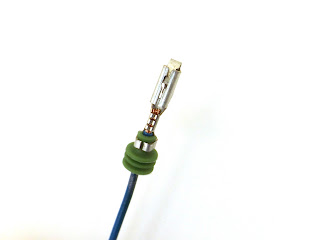
Crimping Metri-Pack Terminals is a little different than the standard Crimp tool that simultaniously does the conductor and insulation at once.
Metri-Pack Terminals can be purchased here, I recommend picking up extra to practice with http://www.cycleterminal.com/fuse-boxes.html
Metri-Pack Terminals can be purchased here, I recommend picking up extra to practice with http://www.cycleterminal.com/fuse-boxes.html
With this tool it will be a two step procedure, The conductor, then the wire seal.
There are a lot of different types of tooling out there, keep that in mind.
A decent selection can be purchased here http://www.cycleterminal.com/crimp-tools.html at very good pricing.
Then you can strip the wire carefully so you don't nick or cut any of the stranded wires.
Next -
Place the terminal in the die, so the wings for the conductor crimp are positioned toward the wire seal just off the die about .5mm.
(As seen in this photo)
This will give you a bell mouth, so the tool or crimped terminal does not cut into the wire stranding.
Make sure the wire stranding from your striped wire is straight, not spread out/apart, and not twisted. Insert your striped wire into the terminal, making sure all the strands make it into the terminal to be crimped.
(I normally slide the seal just up to the bare wire before inserting the wire into the terminal) I did it like this for the photo’s.
You should have something like this on the left.
This will only get a partial crimp, with the largest die on this tool.
You want just enough of a crimp to hold the seal in place, You don’t want to cut into it.
So stop applying pressure when you get to this point,
as seen in the photo on the right.
 Release the ratchet using the lever at the bottom of the tool frame, you should now have a crimped terminal that looks like the photo on the right.
Good luck, you can do it too!!
Metri-
Basically the same as above.
This will be a 2 step crimp as well, the Conductor, then the insulator.
Using a standard 250 14-
Even though this tool is not designed for these terminals you can get some really good crimps with it.
(Provided you use the proper terminal, Wire Size, and tool die)
On the left is a photo of the back side of the terminal, showing the pressure the die put on the terminal.
And this one looks pretty good.
Now you can crimp the insulation with one of the larger dies.
(You may not want a complete crimp here as you do not want to pierce the insulation with the crimp)
And this should be your results when finished.
Good luck!!
I hope to get some photo’s of the smaller pin terminals soon!!


No comments:
Post a Comment